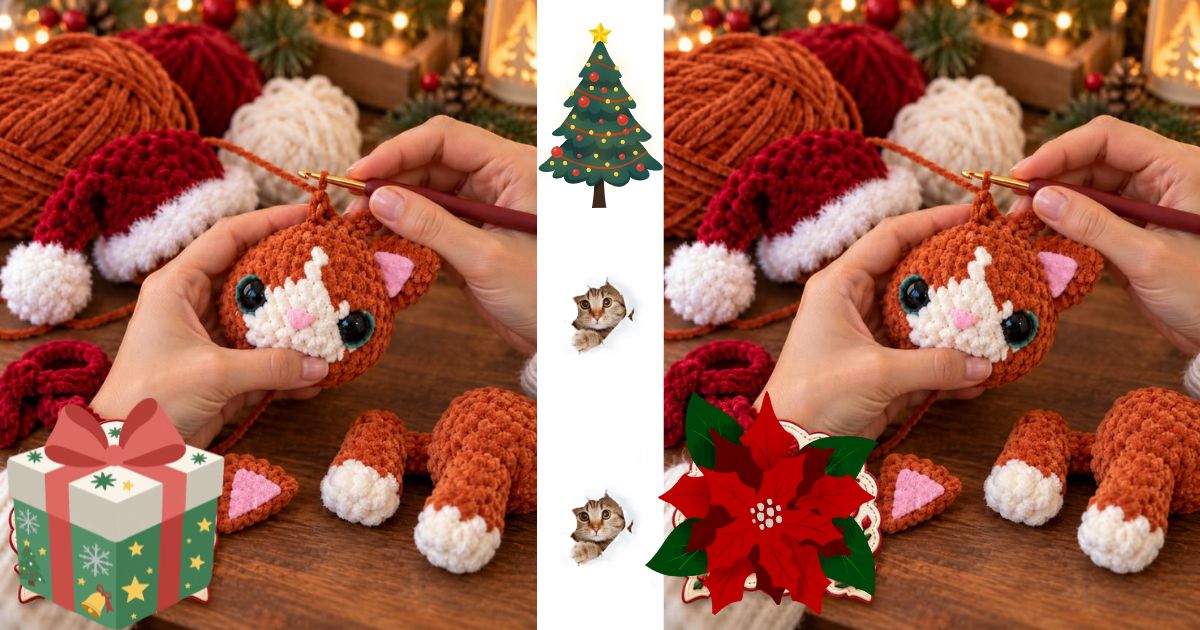
Make a little amigurumi cat in a Santa hat with this free beginner pattern. Step-by-step rounds, amigurumi tips, colour ideas to match your own cat, and how to keep it safe from your real one.
Amigurumi, the Japanese art of crocheting small stuffed figures, is one of the most popular crochet trends on Pinterest. And a little cat in a Santa hat might just be the most festive amigurumi of all.
Advertisement
This sitting Santa cat stands about 10 cm tall, with a round head, a chubby body, little paws, a curled tail and a red Santa hat with a white brim. It makes a sweet mantelpiece decoration, a gift for any cat lover, or a keepsake that looks just like your own cat.
Below you'll find the free pattern, beginner tips for neat amigurumi, colour ideas to match different coat colours, and some important advice on keeping your amigurumi, and your real cat, safe.
Pattern at a glance
| Detail | Information |
|---|---|
| Skill level | Advanced beginner |
| Time | About 3 to 4 hours |
| Finished size | About 10 cm tall, sitting, including the hat |
| Yarn | Worsted or aran weight (8 or 10 ply) |
| Hook | 3 mm or 3.5 mm (US D-3 or E-4), smaller than usual for amigurumi |
| Terms | US, with UK and Australian equivalents |
Materials
- Main colour yarn for the cat, about 25 g
- Red yarn for the hat, about 8 g
- White yarn for the hat brim and bobble, about 5 g
- Black and pink yarn for embroidering the face
- 3 mm or 3.5 mm crochet hook
- Polyester fibrefill
- Yarn needle and stitch marker
- Pins for positioning parts before sewing
Embroidered eyes, not safety eyes
Many amigurumi patterns use plastic safety eyes. In a home with cats or young children, embroidered eyes are the safer choice, because there's nothing hard to chew off and swallow. Use black yarn to make each eye with a few horizontal stitches stacked on top of each other, or a large French knot.
Crochet terms: US vs UK and Australian
| US abbreviation | US term | UK and Australian term |
|---|---|---|
| MR | Magic ring | Magic ring |
| ch | Chain | Chain |
| sl st | Slip stitch | Slip stitch |
| sc | Single crochet | Double crochet (dc) |
| inc | 2 sc in the same stitch | 2 dc in the same stitch |
| dec | sc 2 stitches together | dc 2 stitches together |
| BLO | Back loop only | Same |
| (24) | Stitch count at the end of the round | Same |
Amigurumi tips for beginners
Work in a continuous spiral
Amigurumi is worked in spirals, without joining rounds. Place a stitch marker in the first stitch of each round and move it up as you go, so you never lose your place.
Use a smaller hook
Use a hook one or two sizes smaller than the yarn label suggests. Tight stitches stop stuffing from showing through.
Try the invisible decrease
For a neater finish, decrease through the front loops only: insert your hook into the front loop of the next stitch, then the front loop of the following stitch, yarn over and pull through both loops, then finish the single crochet as usual. It leaves almost no gap.
Stuff firmly, but not too much
Stuff in small pieces, pushing fibrefill into every curve. The piece should feel firm but not stretched, and the stitches shouldn't gap open.
Pin before you sew
Pin every part in place and check it from all angles before sewing. Small changes in the position of the ears or head change the whole expression.
The pattern
Head (main colour)
- Round 1: MR, 6 sc in the ring, pull tight. (6)
- Round 2: inc in each stitch around. (12)
- Round 3: (sc 1, inc) x6. (18)
- Round 4: (sc 2, inc) x6. (24)
- Round 5: (sc 3, inc) x6. (30)
- Rounds 6 to 11: sc in each stitch around. (30)
- Round 12: (sc 3, dec) x6. (24)
- Round 13: (sc 2, dec) x6. (18)
Embroider the face now, before closing the head. Make the eyes between Rounds 8 and 9, about 6 stitches apart. Make a small pink nose centred between and just below the eyes, and a tiny upside-down "Y" mouth below the nose. Add two or three short black whiskers on each side.
Stuff the head firmly.
- Round 14: (sc 1, dec) x6. (12)
- Round 15: dec x6. (6)
Fasten off. Close the opening by threading the yarn through the front loops of the last 6 stitches and pulling tight. Weave in the end.
Ears (make 2, main colour)
- Round 1: MR, 4 sc in the ring, pull tight. (4)
- Round 2: (sc 1, inc) x2. (6)
- Round 3: (sc 1, inc) x3. (9)
- Round 4: sc in each stitch around. (9)
Fasten off, leaving a 20 cm tail. Don't stuff. Flatten each ear and sew it to the top of the head, between Rounds 3 and 5, angled slightly outward. One ear will be partly under the hat.
Body (main colour)
- Round 1: MR, 6 sc in the ring, pull tight. (6)
- Round 2: inc in each stitch around. (12)
- Round 3: (sc 1, inc) x6. (18)
- Round 4: (sc 2, inc) x6. (24)
- Round 5: BLO, sc in each stitch around. (24) This creates a flat base so your cat can sit.
- Rounds 6 to 8: sc in each stitch around. (24)
- Round 9: (sc 2, dec) x6. (18)
- Rounds 10 to 12: sc in each stitch around. (18)
- Round 13: (sc 1, dec) x6. (12)
Stuff the body firmly, especially the base. Fasten off, leaving a 40 cm tail. Sew the open end of the body to the bottom of the head, centred.
Front paws (make 2, main colour)
- Round 1: MR, 6 sc in the ring, pull tight. (6)
- Rounds 2 to 5: sc in each stitch around. (6)
Stuff the tip lightly. Flatten the open end and sew the paws to the front of the body, just under the head, so they rest on the base.
Back paws (make 2, main colour)
- Round 1: MR, 6 sc in the ring, pull tight. (6)
- Rounds 2 and 3: sc in each stitch around. (6)
Stuff lightly. Sew them flat on each side of the base, pointing forward, so they peek out under the front paws.
Tail (main colour)
- Round 1: MR, 5 sc in the ring, pull tight. (5)
- Rounds 2 to 12: sc in each stitch around. (5)
Don't stuff, or stuff very lightly with a thin strand of fibrefill. Sew the open end to the back of the body at the base, then curl the tail around the side and tack it down with a few stitches.
Santa hat (red, then white)
Start at the tip with red yarn.
Advertisement
- Round 1: MR, 4 sc in the ring, pull tight. (4)
- Round 2: sc in each stitch around. (4)
- Round 3: (sc 1, inc) x2. (6)
- Round 4: sc in each stitch around. (6)
- Round 5: (sc 1, inc) x3. (9)
- Round 6: sc in each stitch around. (9)
- Round 7: (sc 2, inc) x3. (12)
- Round 8: sc in each stitch around. (12)
- Round 9: (sc 1, inc) x6. (18)
- Round 10: sc in each stitch around. (18)
- Round 11: (sc 2, inc) x6. (24)
- Round 12: (sc 3, inc) x6. (30)
Change to white.
- Rounds 13 and 14: sc in each stitch around. (30)
Fasten off, leaving a 40 cm tail. Fold the white brim up slightly. Place the hat on the head, tilted to one side, and sew it on all the way around the brim. Bend the tip over and tack it down with a stitch.
Hat bobble (white)
Instead of a yarn pompom, which can shed strands, make a small crochet bobble:
- Round 1: MR, 6 sc in the ring, pull tight. (6)
- Round 2: inc in each stitch around. (12)
- Round 3: sc in each stitch around. (12)
- Round 4: dec x6. (6)
Stuff lightly, close, and sew firmly to the tip of the hat.
Make your Santa cat look like a real cat
| Coat | Colour idea |
|---|---|
| Ginger | Orange main colour, with darker orange stripes embroidered across the back |
| Black | Black main colour, with green or yellow embroidered eyes |
| Tabby | Grey or brown main colour, with an embroidered "M" on the forehead |
| Tuxedo | Black head and body, with a white muzzle and white front paws |
| White | White or cream, with blue or green eyes |
| Calico | White base, with orange and black patches embroidered or added in surface crochet |
| Siamese-style | Cream body, with brown ears, paws, tail and face mask |
Stripes in the round
For a striped cat, change colour every two rounds on the body and tail. Change colour in the last step of the final stitch of a round, so the new colour starts cleanly.
Keeping your amigurumi and your cat safe
Amigurumi is a decoration, not a cat toy
This Santa cat has small sewn-on parts, embroidery and a curled tail that a real cat could chew off. Display it on a high shelf, mantel or windowsill your cat can't reach.
VCA Animal Hospitals explains that swallowed yarn can lodge in a cat's digestive tract and cause the intestines to bunch up and tear. Signs include vomiting, not eating and lethargy, and surgery is usually needed. Vet Help Direct warns never to pull on string you see hanging from a cat's mouth or bottom. Contact your vet straight away.
Make your cat its own festive toy
If your cat can't resist your crochet, make it a safe toy of its own. Try our crochet Christmas pudding cat toy or the easy crochet cat toy patterns, which are designed without loose parts.
Store your yarn safely
Keep yarn, works in progress and finished amigurumi in a closed bag or box when you're not around. A cat left alone with a ball of yarn is one of the most common ways yarn gets swallowed.
Ways to display and gift your Santa cat
- Mantel decoration beside a crochet cat Christmas stocking
- Tree topper for a small tabletop tree, placed out of your cat's reach
- Gift for a cat lover, made to look like their own cat
- Advent surprise, hidden on the last day of an advent calendar
- Keepsake to remember a much-loved cat
For more festive cat ideas, see our guide to Christmas cat tree ideas.
Santa cat checklist
- [ ] I'm using a smaller hook for tight stitches.
- [ ] The face is embroidered before closing the head.
- [ ] I've used embroidered eyes, not safety eyes.
- [ ] The body has a flat base so the cat sits upright.
- [ ] All parts are pinned in place before sewing.
- [ ] The hat bobble is crocheted, not a yarn pompom.
- [ ] All ends are woven in securely.
- [ ] The finished amigurumi is displayed out of my cat's reach.
Frequently asked questions
Is this Santa cat amigurumi good for beginners?
Yes, for an advanced beginner. It uses a magic ring, single crochet, increases, decreases and back loop stitches. The trickiest part is sewing the pieces together neatly, so take your time and pin everything first.
What size hook should I use for amigurumi?
Use a hook one or two sizes smaller than the yarn label recommends. With worsted or aran yarn, a 3 mm or 3.5 mm hook gives tight stitches that hide the stuffing.
Should I use safety eyes?
Safety eyes look neat, but in a home with cats or young children, embroidered eyes are safer because there's nothing hard to chew off. Embroider the eyes before you close and stuff the head.
Can I give this amigurumi to my cat as a toy?
No. It's a decoration with small sewn-on parts a cat could chew off and swallow. For a cat toy, use a pattern designed for cats, with no loose parts.
How do I make the cat sit up?
Round 5 of the body is worked in the back loops only, which creates a flat base. Stuff the base firmly, and the cat will sit upright on its own.
Is the pattern in US or UK terms?
US terms. In UK and Australian terms, single crochet (sc) is double crochet (dc). The terms table above shows all the conversions.
Related guides
Sources
- VCA Animal Hospitals, Foreign body in cats
- Vet Help Direct, My cat's swallowed some string, should I pull it out?
This pattern is an original InfoDogCats design, free for personal use. Safety information is general only and not a substitute for advice from your vet.
Advertisement